Mautic Know-How
Mautic Know-How
Mautic Tutorials for Beginners & Tips for Specialists

Integrate postcards via "Mautic - Deutsche Post" Plugin (2021 version)

With our plugin, print mailings can be personalized using Deutsche Post's „Print-Mailing Automation" (a.k.a. "Triggerdialog") product, to be integrated directly into your Mautic campaign - and automatically sent when it makes the most sense.

What is the plugin for?

Leuchtfeuer has developed the Triggerdialog-Plugin in cooperation with Deutsche Post AG to enable the sending of postcards directly from the Marketing Automation Tool, personalized and at the individually perfect time.
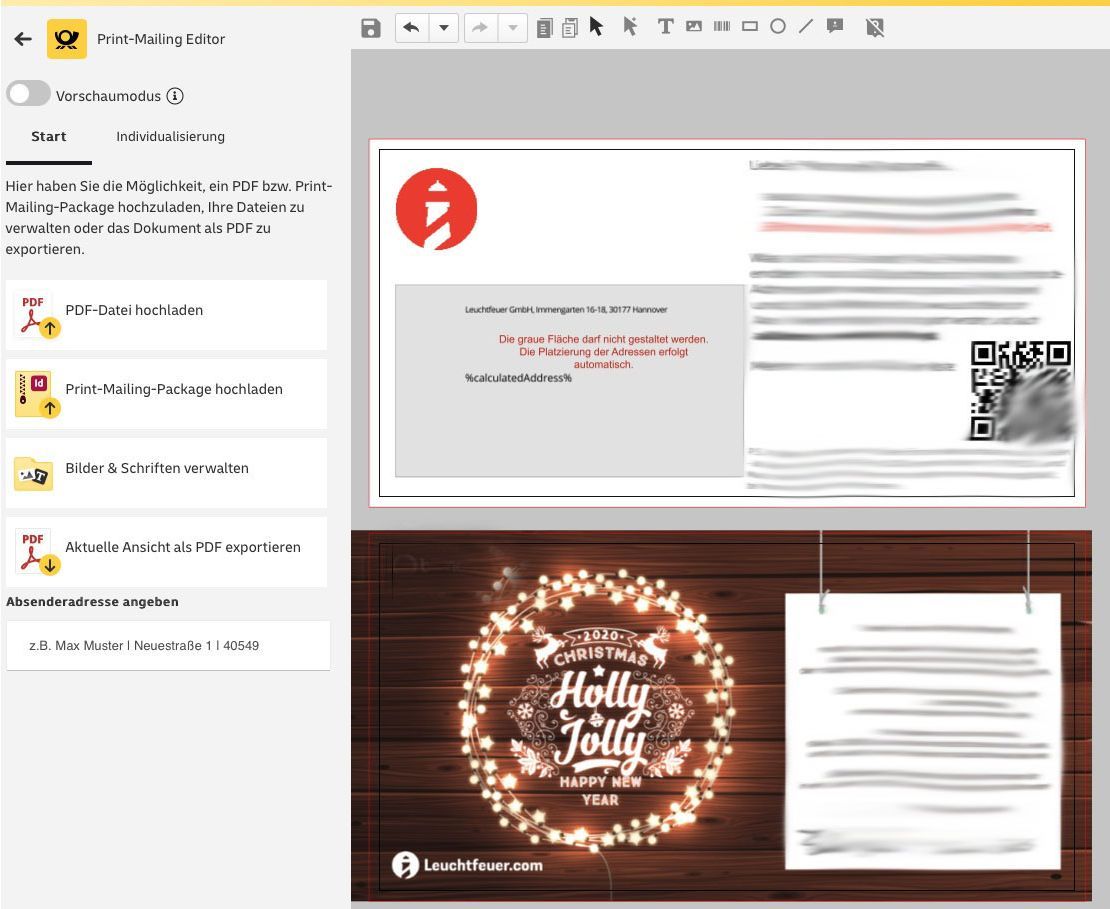
Mautic users can use the plugin to integrate the sending of a print mailing as a new action directly into their Mautic campaign - based on the normal logic modules (e.g. "email unopened?" or "booking cancelled?"). The corresponding postcards can, of course, be completely designed and personalized for each recipient, so that he can be addressed directly or, for example, given a special discount code. You can find out more about the benefits and possible applications of the Triggerdialog-Plugin here.

Installation and Basic Configuration

The installation of the plugin requires, in addition to a Mautic account, a customer account for the Triggerdialog administration website of Deutsche Post - more information can be found on the website Triggerdialog by Deutschen Post AG

Requirements

  • Mautic Version 3.x
  • Command line access to the server

Installation

  • Download plugin "mautic-deutschepost" from Github (as ZIP archive) to the Mautic-Server
  • Unpack the file, rename the directory and move it to the plugin directory of the Mautic installation

    mv mautic-deutschepost-master <path-to-mautic>/plugins/LeuchtfeuerPrintmailingBundle
  • Clear cache, typically:

    sudo -u www-data php <path-to-mautic>/bin/console cache:clear
  • adjust file permissions if needed:
    chown -R www-data:www-data <path-to-mautic>/plugins/LeuchtfeuerPrintmailingBundle
  • Go to "Settings" -> "Plugins" in the Mautic-Backend, klick on "Install/Update Plugins"
  • "Dt. Post" is now in the Plugin list, and is already activated

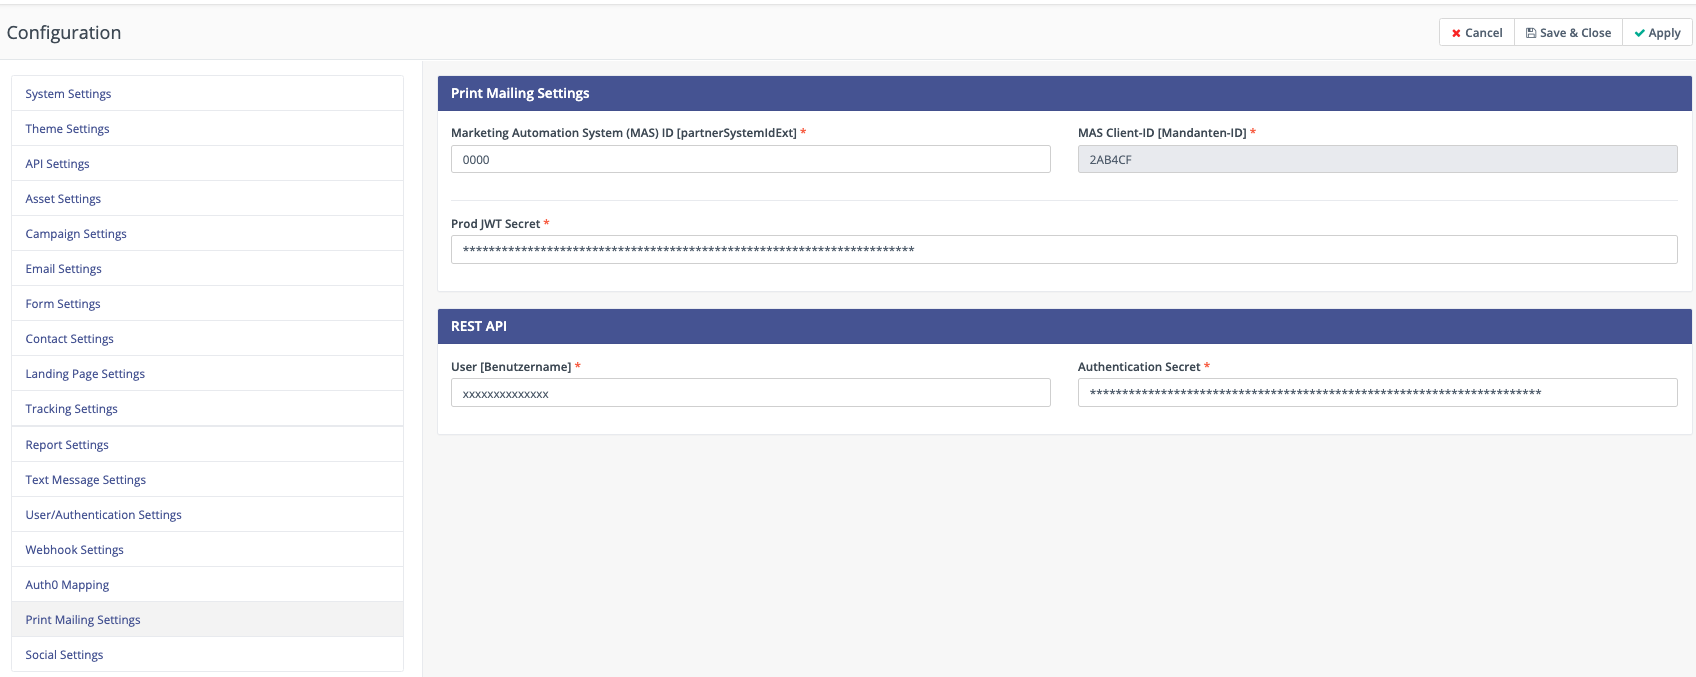
The following configuration is easy: You can make all necessary settings under "Settings" -> "Configuration" -> "Trigger Dialog Settings".

  • MAS ID (technical name is "partnerSystemIdExt") - identifies the remote system (i.e. Deutsche Post)
  • "Mandanten-ID" - identifies your own System. IMPORTANT: You need to submit this ID to Deutsche Post, or else you will not have access!
  • "Prod JWT Secret" - allows for Single Sign-On from Mautic into Deutsche Post
  • User und password ("Authentication Secret") - required for data transfer from your system to Deutsche Post


Configuration done, and "Mandanten-ID" (see above) reported to Deutsche Post?

Now it gets exciting: In "Channels" -> "Deutsche Post", click on the blue button "PRINT-MAILING MANAGER" (top right) to switch to the Deutsche Post interface, and thus verify your configuration.

If you arrive there - in the "yellow surface" - and see your name in the top right corner, everything worked!

Creating a Mapping Template in Mautic

Everything else now works pretty much like for emails: Before you can integrate the first Print-Mailing action into your campaign, you have to create a template.

In "Channels" -> "Deutsche Post", click "+New" to create a new Print-Mailing mapping template in Mautic.

In the tab "Data Mapping", the desired data can be selected for transfer when a postcard is initiated. One field of type "Zip code" is mandatory; and of course that complete address data is required for successful postal delivery. Therefore, a basic set of data is already pre-assigned in every new template (which can of course be changed).

For each mapping template, you will be able to assign design etc. in the next steps, through Deutsche Post's Print-Mailing Manager.

That's it with the preparations within Mautic. The visual design (e.g. using InDesign or the modern online editor) and other configuration of the postcard are not happending in Mautic, but directly in the Print Mailing Manager.

So press the blue button - see above - and you can continue in Deutsche Post's Print Mailing Manager, where you will see the mapping templates that you created, and can set up design, product properties etc for each of them.

If you are using the online editor, you can also create or edit designs directly in your browser:

Integration in Mautic campaigns

The plugin comes with a new campaign action: “Send via Deutsche Post”.

Again, just like with email, you can now select from your existing templates - i.e. from the Print-Mailing mapping templates that you created in Mautic.

Mautic then uses the plugin to send the data to Deutsche Post for printing and delivery - and shortly afterwards your contact has his individual postcard in his mailbox.

Your browser is outdated!

Please update your browser to see this website correct. Update your browser now